Why would you want to see the Google Results from custom geolocations?
Edit: January 2020 – There are some issues with geolocations not working without having a correct timezone ID attributed to it. Timezone IDs must be entered now. Generally, this can be remedied by removing the current value and replacing it with “/undefined”. There is a full list on Github of all timezone IDs. If it doesn’t work on first try, remove it and put it in again, your name field should read “other…” if done correctly.
Here’s the problem we were faced with; we work with a number of clients from all over the world, and want to replicate the exact Google results that they see. What we see on Google.com.au from the UK isn’t necessarily the exact results that someone in Australia would see in Google.com.au for the same term. You’ll possibly not be able to see the ads that have just been set to show to someone in Australia, and your 3 pack results might also not show.
This easy trick can save you hours of having to navigate through a sea of VPN’s and pay-wall restricted tools to see Google’s search engine results page (SERP) as if you are viewing from a completely different location!
Many people are unaware of some of the fantastic tools that Google has integrated within Google Chrome Developer Tools. From being able to inspect elements to SEO & page-speed audits Google Chrome has plenty to offer in helping us growing our understanding of Search Engine Optimisation and giving useful insights towards improving how our websites work in the modern, competitive era of responsive designs and well-optimised content!
Step 1 – Opening a Google Chrome Incognito Window
This method is best done on a computer rather than mobile or tablet device.
First, you’ll need to open Google Chrome in an incognito window, this can be done either by clicking on the 3 dots in the top right corner of your browser window and selecting “new incognito window” or simply by pressing CTRL+SHIFT+N simultaneously on your keyboard. The reason we use an incognito window is that famously it doesn’t store browser cookies, search history, or any other information that is liable to interfere with Google’s SERP. We are, as such, viewing as if we are a fresh Google Chrome user with no information saved which Google will use to try to target adverts and tailor search results.

Step 2 – Opening Google Chrome Developer Tools
Secondly, we must open up the Google Chrome Developer Tools. Again, there are 2 methods for this. We can either press CTRL+SHIFT+I simultaneously, or just simply press the F12 button. When we reach Google Developer Tools we can see a number of options available.
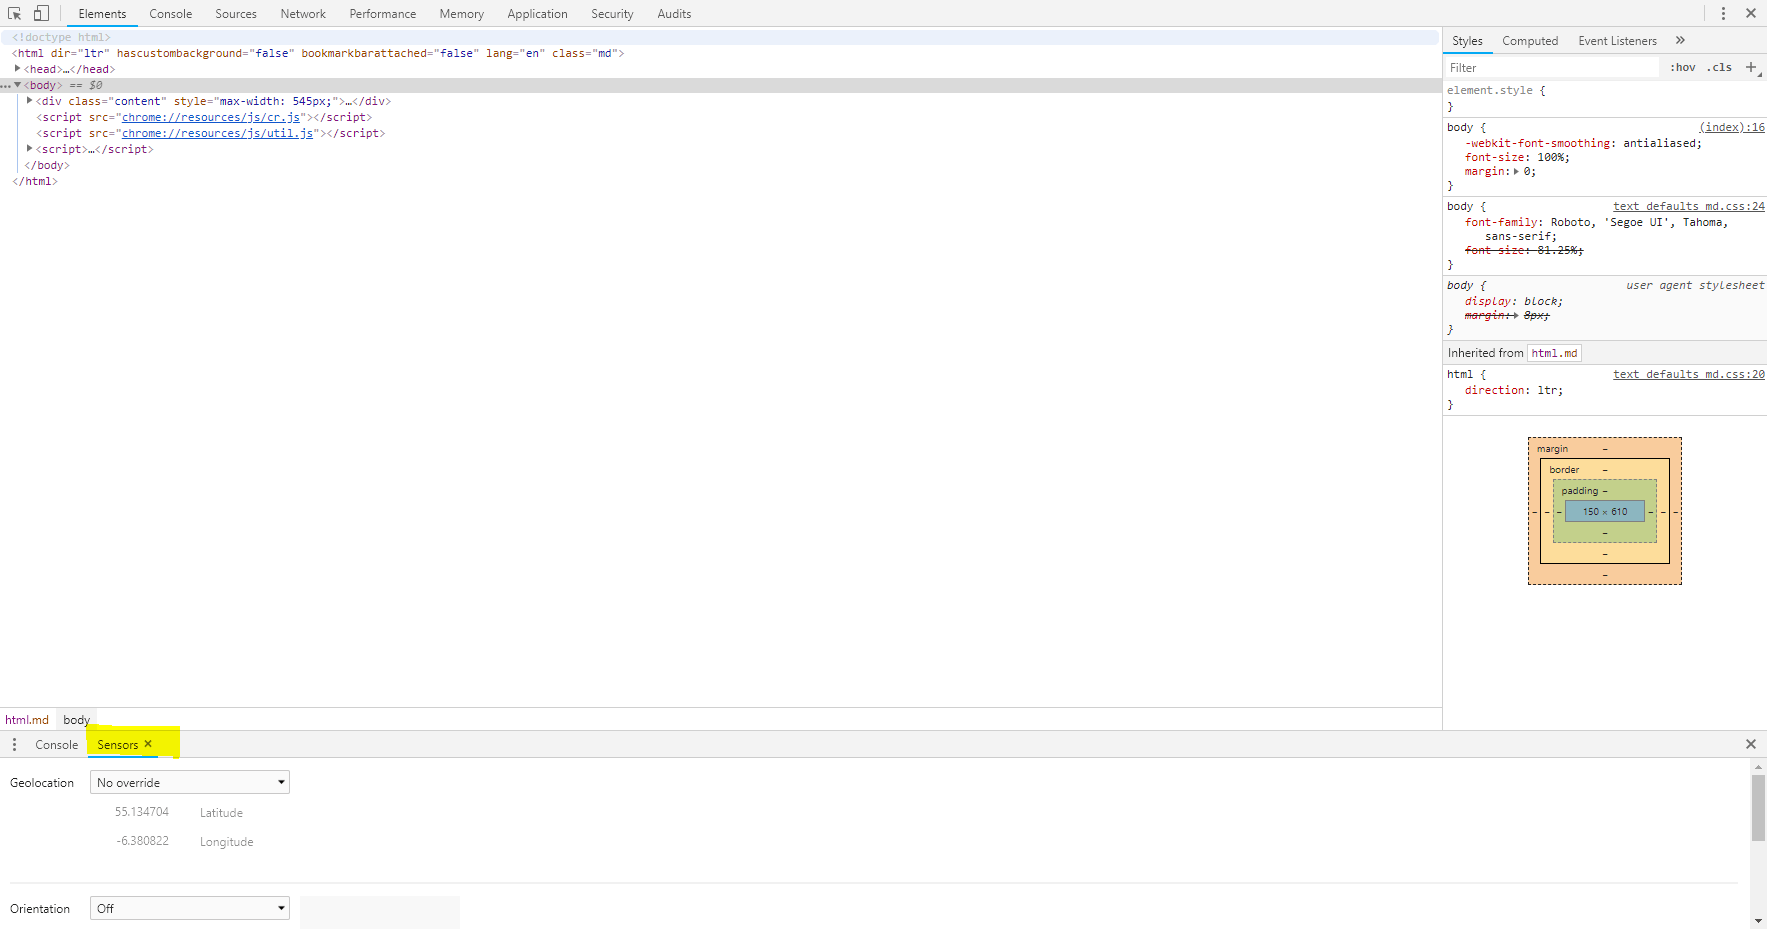
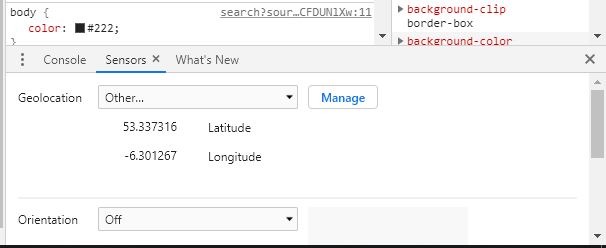
Step 3 – Navigating to Sensors Option
Congratulations, you have successfully made it to the Google Chrome Developer Tools! We can now toggle the Drawer at the bottom using the ESC key, or selecting the 3 dots in the top right, navigating to “More Tools” on the menu and selecting “Sensors”. This will expand to reveal 2 new options, Console & Sensors. If Sensors is selected we will see a “Geolocation” setting. The default value in the drop-down selector should say “No override”. Once we click on this drop-down we will be offered several customisable preset options; Berlin, London, Moscow, Mountain View, Mumbai, San Francisco, Shanghai, Sao Paulo, Toyko and Location Unavailable.
Step 4 – Setting a Custom Location Override
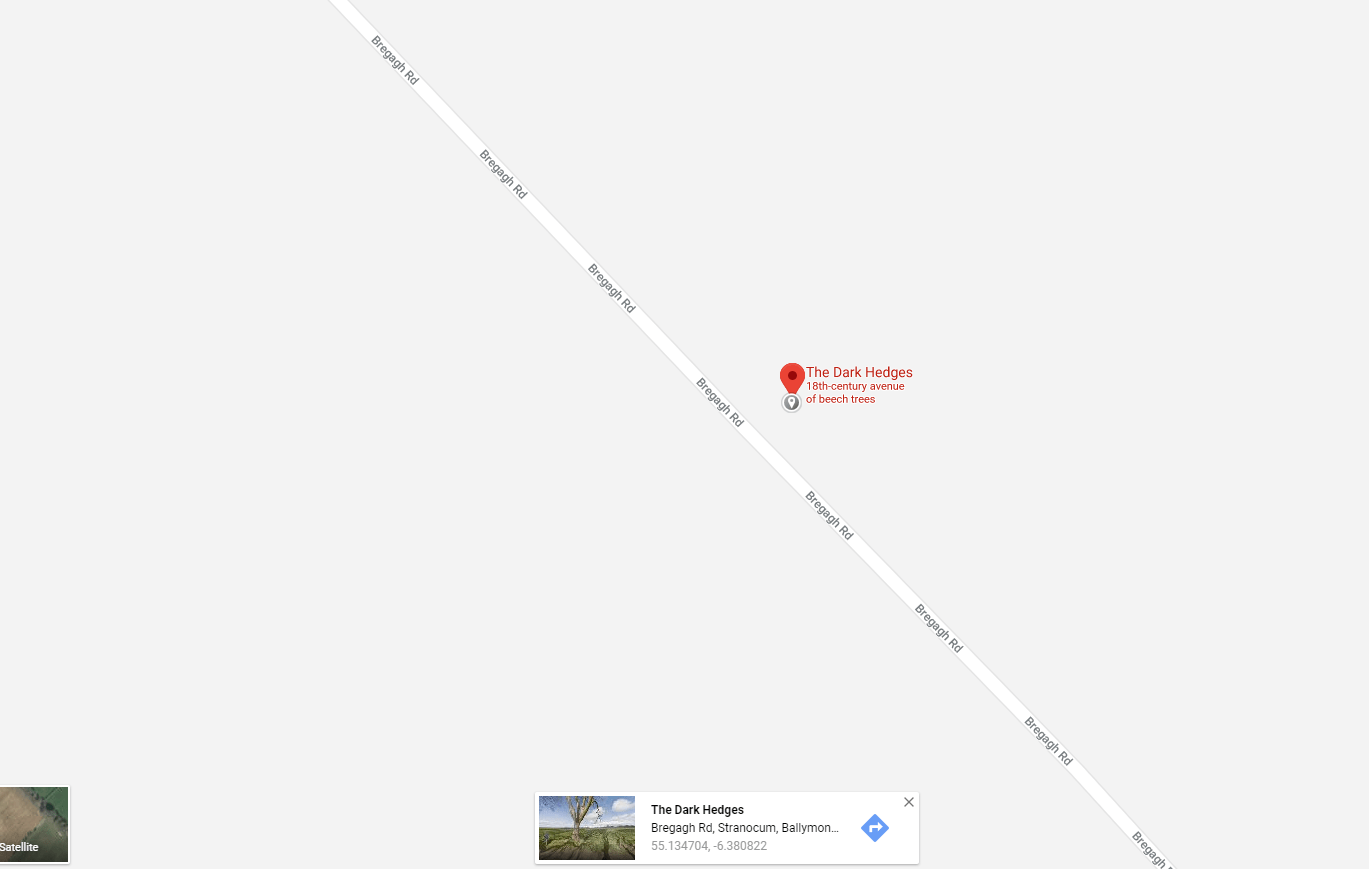
To set this to a custom location we must first know the coordinates of where we would like to search from. For this example, the location I have decided to search from the famous Dark Hedges featured in Game of Thrones!
Step 5 – Finding Coordinates of Target Location
Finding Coordinates is possible in a few different ways. Some resources which are useful for finding coordinates are Wikipedia, which often has coordinates listed on the Wiki pages of cities, areas and landmarks, and Google Maps. In Google maps to find coordinates for a location simply navigate to your target location on Google Maps, right click and select “What’s Here?”. This will open a small box at the bottom of your Google Maps view giving you the coordinates of where your cursor was when you clicked “What’s Here?”.
Step 6 – Entering Coordinates to Geo-location Sensor
Please note when entering your coordinates that positive values are for North and East, whilst negative values are given for South and West. We must ensure that you include the “-” sign before any South & Western longitude and latitude values. Make sure that the latitude values and longitude values are entered into the correct fields. Once this is done we can move on to the next step.
Step 7 – Forcing A Location Update
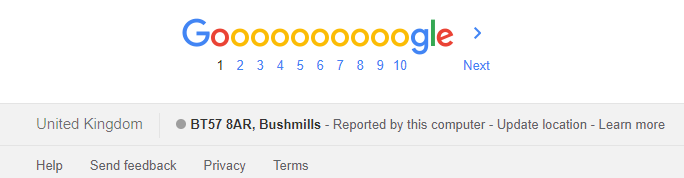
Once you have successfully entered the coordinates of the location, navigate to Google and make a search, once you have done this, scroll to the very bottom and click “Use Precise Location” or “Update Location”. Google is now set to search from your new location.
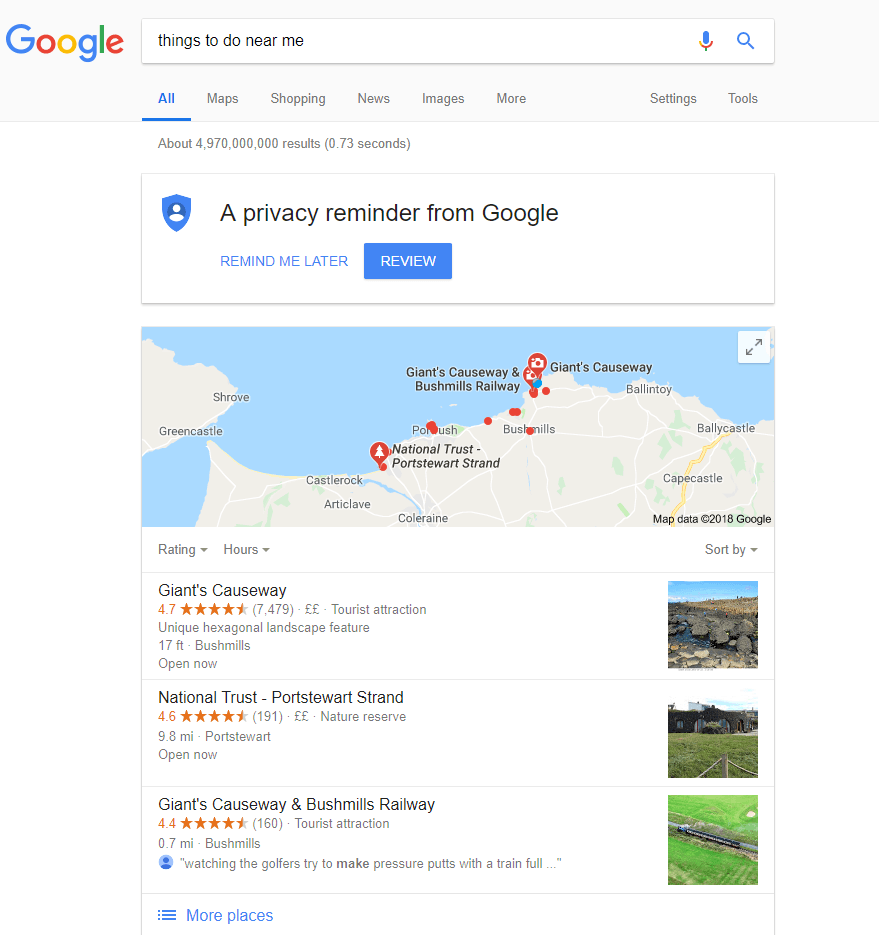
Step 8 – Searching From Your New Location
You have now successfully changed your search location! All you need to do now is search on Google for your keyword! Please note, when Google asks to know your location it is imperative that you accept, otherwise, your location settings will not work.
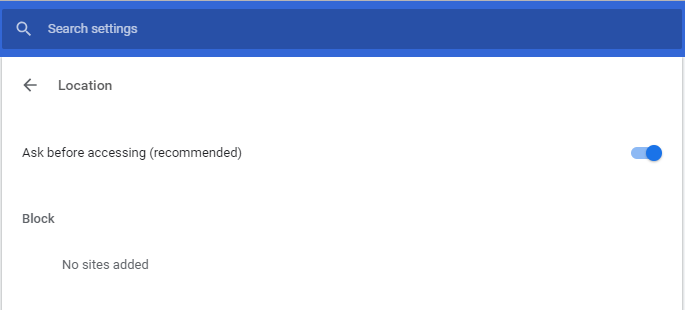
If you are still having problems adjusting your location after following these steps you must ensure that you have not blocked Google Chrome accessing your location. You can check, and fix this problem by navigating to location settings under “content”. You can access your location settings by typing or pasting “chrome://settings/content/
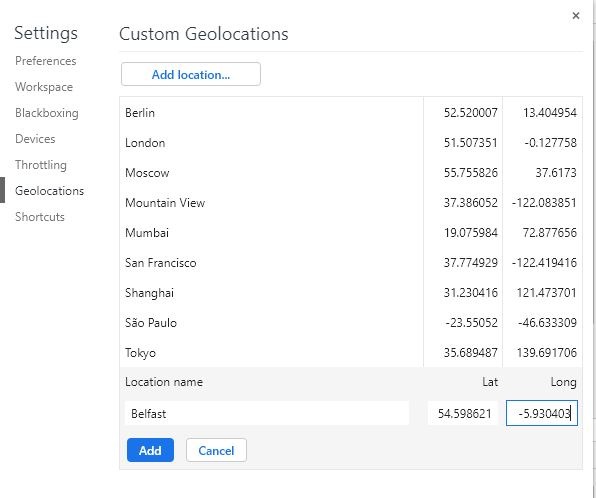
Step 9 – Creating Custom Presets
Now that you have learned how to change your location on Google, it is a good time to start populating your custom presets of areas that you’ll most often be searching from. In the bottom right corner of Google Chrome with developer tools open and continuing on from the previous tasks, click on “Manage” next to your geolocation option, this may be “other…”, your current custom location, or one of the presets from the list.
Once you’ve clicked on Manage you will find yourself on the “Custom Geolocations” panel. Add your new location name, latitude, longitude, then click “add” to confirm once you have completed the fields. Once you have done this, you can now easily navigate and use your custom search locations from sensors on Google Developer tools without having to add the locations every time.
Need a hand?
If you need help finding new customers either locally, or further afield don’t hesitate to get in touch! Here, at Codefixer we have years of experience working with businesses to get the most out of their online marketing! We offer fully managed services such as PPC, SEO, WordPress Development as well as 5* Training in Google, Ads & SEO for businesses looking to take their digital marketing to the next level!


